Step 1: Follow Us on Instagram
Go to @UncoverLebanon and follow our page.
Step 2: Get Your Free Access Voucher
Send us a DM with “Voucher” to receive your free access code.
⚠️ Important: Once you receive the voucher, don’t use the map from the Instagram browser. Instead, open the website in your device’s external browser (e.g., Safari or Chrome) for full functionality.
Step 3: Visit the Website
Go to map.uncoverlebanon.com in your browser.
Step 4: Register Your Account
Click on “Register,” fill in your full name, mobile phone number, email, and voucher code, and then click the Register button.
Step 5: Start Exploring
You’ll be logged in automatically and can immediately access the map.
Navigation & Features
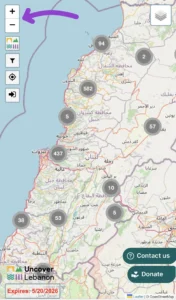
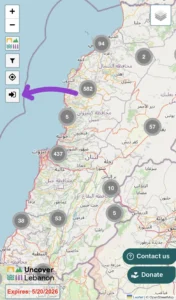
1. Zoom In / Out
Use the + and – buttons on the left to zoom in and out of the map. (If you’re on a phone or tablet, you can also use your fingers to zoom by pinching in or out.)
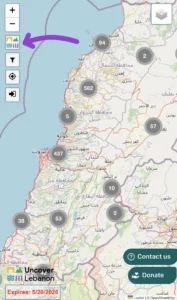
2. Landmark Categories Button
Click the Landmark Categories button to view all categories available on the map.
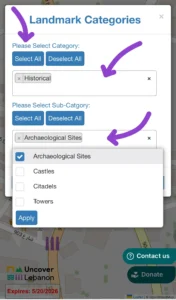
3. Landmark Categories Popup
Inside the popup, you can select all categories and related sub-categories, or choose specific ones by clicking on the white field.
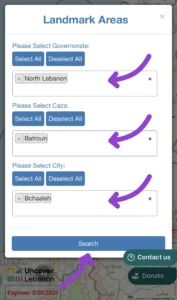
4. Landmark Areas Button
Click the filter button to open the landmark areas pop-up.

5. Landmark Areas Popup
From there, you can select one or more Governorate, then choose one or more related Caza/s and the related City/ies or Town/s. Once you’ve made your selections, click the search button to filter the map based on your selections.
6. Locate Me
Click the location button to mark your current location on the map. (You need to enable location on your PC or Mobile).

7. Logout
Click the logout button to log out of your account.
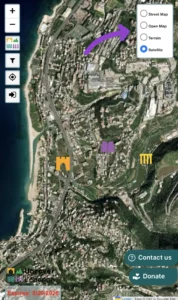
8. Change Map View
Click the button on the right to change the map view from street map (default) to open map, terrain, or satellite view.
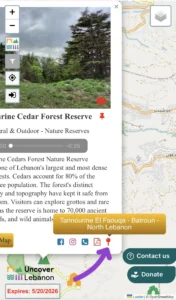
Landmark Information Panel
1. Name, Image, Text & Audio Description
Each landmark should contain a name, a photo, a written description, and an audio description
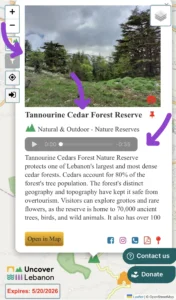
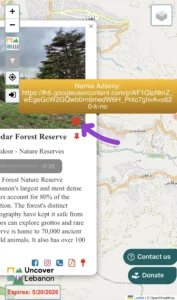
2. Camera Button
Clicking the camera icon will show the web source of the photo.
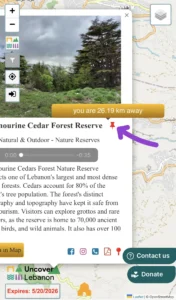
3. Distance Button
This button tells you how far you are from the landmark in kilometers using your current location.
4. Category Name
The category and the sub-category to which the landmark belongs is displayed — e.g., Nature & Outdoor – Nature Reserves.

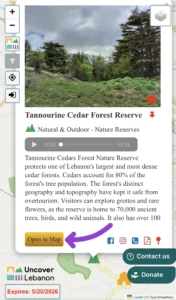
5. Open in Maps Button
Opens the selected landmark in your default map app or Google Maps for directions.
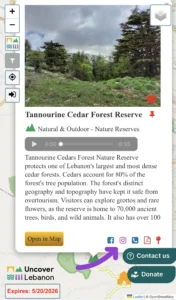
6. Media Buttons
When available, Facebook, Instagram, Phone Number, and Information Sheet icons will appear as additional info for the landmark.
7. Location Details Button
Clicking this button reveals the full administrative location of the place: City/Town – Caza – Governorate.